

The family is out of bread? It's time to
pull out the Bosch Mixer and get to work. We keep all of our small
appliances in thus little garage under the baking cupboard. This
cupboard hols all the cook books and baking spices like cloves, nutmeg,
cream of tartar, etc. The pints on the top four shelves are full of
other spices like cumin, oregano, cilantro, etc. The biggest containers
are full of oats, wheat, and sucanat, and under those we have salt, corn
starch, baking powder, and soda.
We're off and running!

My little cousin decided helped me set up the Bosch mixer, but she was a little hesitant to donate her "necklace" to the cause. Shes such a cutie!

This water-yeast-salt-honey-oil mixture looks pretty unappetizing, but that can be easily fixed with a little flour ... well, maybe not just a little.

This is out wheat grinder. We've had it FOREVER, in fact, I can't remember a time when we didn't have it! It used to have two grey sponges that went where the washcloth is in the photo above. They used to sit on top of the flour canister and let the air out, but not the flour. However, both of the sponges (on two different occasions) ended up in the bread dough and resulted in an entire batch of bread being tossed into the compost. Now we use this knitted washcloth that an elderly lady gave us many many years ago. It gets the job done!

We get our red and white wheat from the Chrurch of Jesus Christ of Latter Day Saint's (Mormon) Church Storehouse. The store house can offer lots of bulk items for cheap because its entirely run by volunteers. We get our beans and wheat there and then put it all into buckets so it will keep in the basement for longer.

The kind of wheat we used is called white wheat because it makes a lighter finer flour which is great for bread. We still have a lot of red wheat in the basement which we don't use as much because it makes a courser heaver flour, but for a while we were mixing the two (just to use up the red wheat) and weren't disappointed with the result.


My little cousins found the wheat and had a great time sliding their fingers in and out of the grains. They were very good about keeping it all inside the bucket and not on the floor.

Grind the Wheat...

Warm Fresh Flour

This is the trickiest part ... as far as I'm concerned. There is no set measurement of flour for this recipe so you have to know the consistency by glance. Just add flour until it reached that perfect consistency. I usually have to gride two batches of wheat to get enough.
Take a look at the two pictures below to get an idea of what to look for.

This dough still doesn't have enough flour. How can I tell: It's sticking to the edge of the mixer.

Now that's perfect. See how the dough has pulled away from the edge? Watch for that, it's the signal to stop dumping that flour.

After the dough beats for ten to fifteen minutes it's time to let it rise.

I punch the dough down when it doubles in size, but I know that some of my Amish friends let it rise for a specific amount of time and some of them even let it rise two or three times. I've never tried either of those tricks, but wonder if it would turn out better that way???

Here we punch down the dough to it's original size.

At the bakery that I work at (yes, I still work there!) we weigh the dough at this point so all the loaves are one uniform size. I know my grandma does too, but we don't mind varying sizes so we just do what looks and feels right. My grandma also slaps the dough down on the counter top a couple times before forming the loaves to get out any air bubbles.

Form the loaves by taking a lump in both of your hands and pushing
your fingers up into loaf while your thumbs smooth the sides. Keep
shaping until you're happy and them lay it in the greased bread pans.
We like to do all kinds of stuff with this dough. We make pizza crust,
hot dog and hamburger buns, bread sticks, cinnamon rolls, pizza pockets,
brioches, etc. They're all just different shapes but the same dough.

Let it rise until it doubles
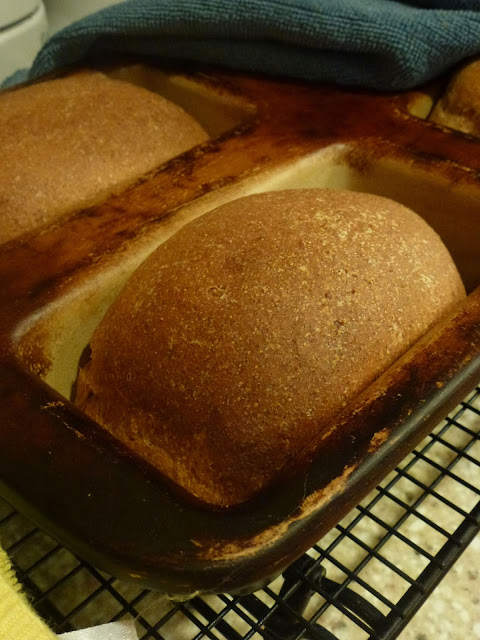
Warm and delicious from the oven. I love to slice a piece from the loaf right away and eat it steamy with nothing on it. It is one of the pleasure of life that so few enjoy anymore.

And there we are! Go try it out and feel good knowing that what you're eating is the product of your blood, sweat and tears ... But truly, it's really not all that difficult. So many cringe when they think about making their own bread, but it's really not Everest. You can do it!
Ingredients:
8 cups warm water
3 TB yeast
2 TB salt
1 cup oil (we use coconut oil, but you can use vegetable oil)
1 cup honey
Flour to consistency
Directions:
Mix together all ingredients. Add flour until the bread dough no longer sticks to the edge of the mixer bowl. Let the dough mix for 10-15 minutes while you grease the bread pans. Let the dough rise until it doubles in size. Punch dough down and then form your loaves. Let the loaves rise until they double in size.
Bake at 400 degrees for 5 minutes, then, without opening the oven or removing the pans, turn down the heat to 350 degrees and cook for 20+ minutes. You know they are ready when the tops are golden brown and the bottoms are not doughy. Remove from the oven and pans and cool on a rack. Enjoy!